vertical crack in corner of wall,
hairline cracks in painted walls,
hairline crack in wall keeps coming back,
cracks in walls and ceilings when to worry,
causes of vertical cracks in walls,
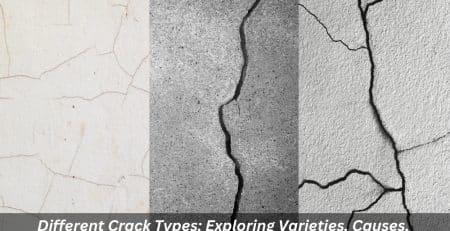
types of cracks in walls,
horizontal hairline crack in wall
Are you worried about the hairline cracks in the walls? Did you recently notice that it has developed cracking along the lines of the internal structure? You may be confused and wonder if this is normal in a new wall.
If you’re building or renovating a house, you must ensure that it’s structurally sound and free of defects. One such defect can be visible cracking on the walls, which can make us worry whether this is an indication of a bigger problem.
Hairline cracks are common in newly constructed structures but there are certain things to consider when these appear. In many cases, minor movement in foundation soil can cause hairline cracks at construction joints and weak mortar lines. Further, settlement from interior or exterior soil problems may lead to further structural damage if not handled properly. This article provides insight into why you could have noticed hairline cracking on newly built walls and how to prevent further damage to your home.
It is important to understand that hairline cracks in a new wall are not necessarily a cause for concern. In most cases, these cracks are caused by minor movement in the foundation soil or settlement from interior or exterior soil problems. However, if you notice any large or wide cracks, it is best to consult a professional to assess the situation and determine if further action needs to be taken.
It is also important to note that hairline cracks can be caused by other factors such as poor workmanship or the use of inferior materials. If you think this might be the issue, it’s best to get a professional to evaluate the situation and decide if further steps should be taken. Professionals also know the standard of workmanship and materials used in construction, so they can help you determine if the hairline cracks are normal or not.
In order to prevent further damage, it is important to ensure that your home’s foundation and walls are properly constructed and maintained. This includes regular inspections of the foundation, walls, and other structural components to ensure that they are in good condition.
In conclusion, hairline cracks in a new wall are not necessarily a cause for concern but it is important to understand the potential causes and take steps to prevent further damage.
Can the hairline crack be fixed?
Yes, the hairline crack can be fixed. Depending on the cause of the crack, there are a few different ways to repair it. If the crack is caused by minor movement in foundation soil or settlement from interior or exterior soil problems, then it can be filled with a flexible sealant and reinforced with mesh tape. This will help prevent further cracking and provide additional support to the wall. Here are some steps to fix a hairline crack:
Step 1: Identify the damage
Identifying the damage is the first step in repairing hairline cracks. Take a look at the wall and assess how severe the damage is. If the cracks are very small, you may be able to fill them without needing to apply a new layer of render.
Step 2: Clean the surface
Cleaning the surface of the wall is important before you start any rendering crack repair work. Use a vacuum cleaner to remove any dirt and debris from the area around the crack.
Step 3: Open up cracks
Once you have identified and cleaned the area, you will need to open up the cracks. This can be done using a chisel or other suitable tool. Carefully chip away at the edges of the crack until it is wide enough for you to fill. Make sure that you do not damage any surrounding areas.
Step 4: Repair the cracks
Once you have opened up the cracks, you can start to repair them. To do this, you will need a render mix. This is a special type of plaster that is designed for use on external walls.
Mix the cement render according to the instructions provided and then apply it to the crack using a trowel. Read here how you can cement render a wall. Make sure that you fill the crack completely and that the surface is level.
Step 5: Allow time to dry
Once you have applied the render, you will need to allow it 24 hours to dry. This is an important step as it will ensure that the render repair is strong and durable.
Step 6: Apply a coat of render
After the repair has dried, you can apply a coat of render over the entire wall. This will help to protect the wall from future damage and will also improve its appearance.
Step 7: Paint the rendered wall
Once the render has dried, you can paint the wall. This is an important step as it will help to protect the wall from further damage and will also improve its appearance.
Understanding what causes paint cracking on interior walls can help in addressing wall surface issues.
Conclusion
By following these steps, you can repair hairline cracks in rendered walls quickly and easily. You can also hire a wall crack repair service if you don’t feel confident in doing the job yourself.
Are there any preventative measures that can be taken to avoid future hairline cracks in rendered walls?
Yes, there are several preventative measures that can be taken to avoid future hairline cracks in rendered walls. Firstly, it is important to ensure that the render is applied correctly and evenly. This will help to create a strong and durable surface that is less likely to crack in the future. Secondly, it is important to use a high-quality render mix when applying the render.
This will ensure that the render is strong and durable, which will help to prevent future cracks. Finally, it is important to ensure that the wall is painted regularly. This will help to protect the render from weather damage and will also improve its appearance.
Repairing hairline cracks in rendered walls is a relatively simple process. However, it is important to call a professional to avoid future damage. By following the steps outlined above, you can ensure that your walls remain strong and durable in the long run.